Setting the Foundation
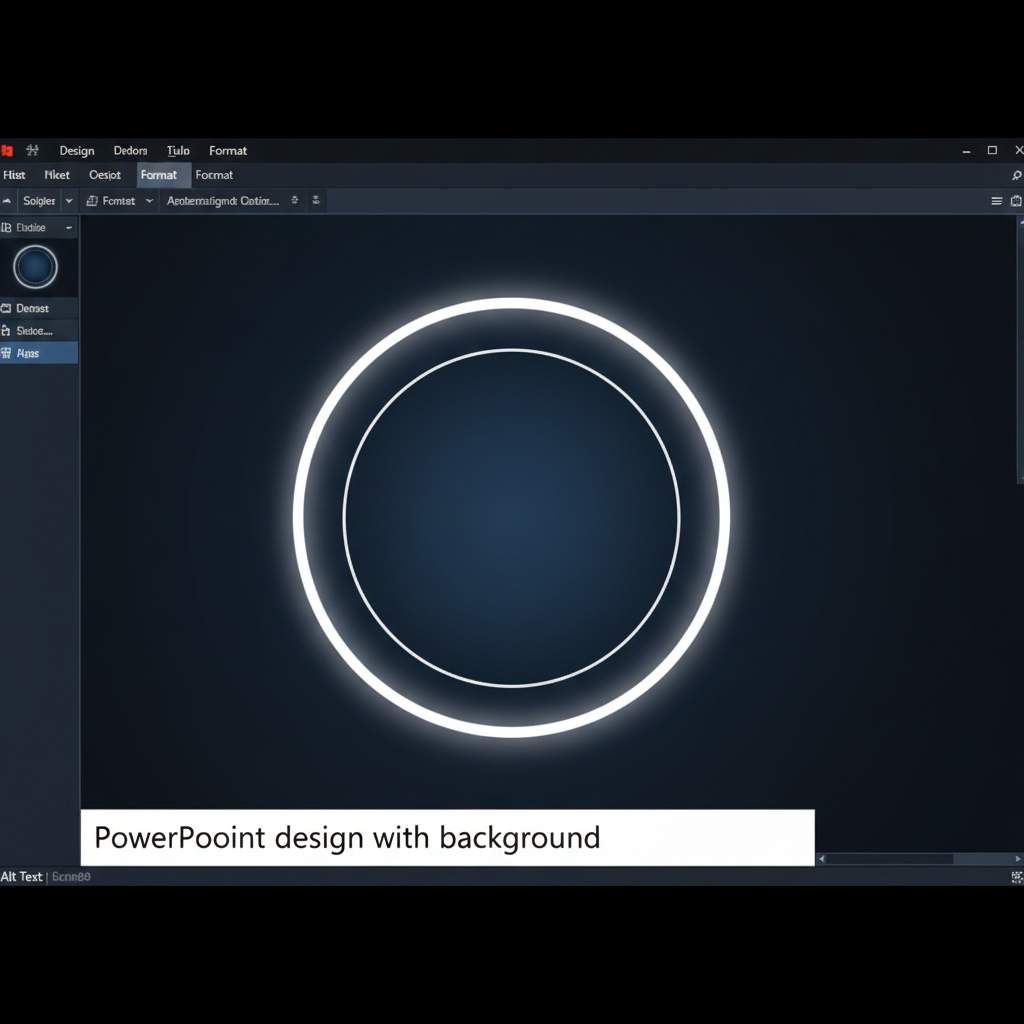
The secret to a high-end look is a consistent color palette and clean shapes. Start by formatting your slide background to a deep, dark blue. This creates a high-contrast environment that makes your elements pop.
On your main navigation slide, insert a large circle (roughly 17 to 18 units in size) and center it perfectly. Give this circle a gradient fill for depth and a solid white border to define its edges. This will serve as the “lens” through which your audience views the rest of your content.
Building Your Sections
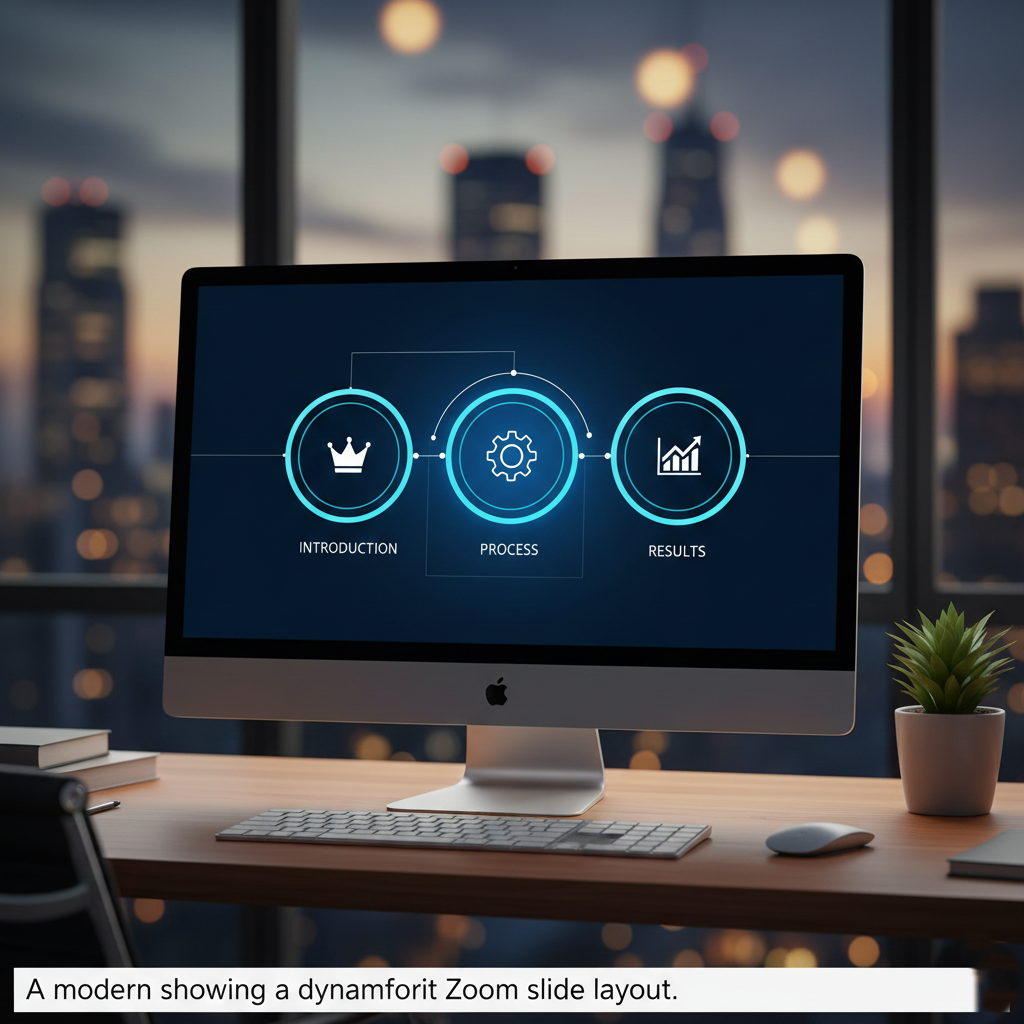
To make a Zoom presentation work, you need to organize your slides into clear sections. For this tutorial, we focus on three main pillars:
- Introduction: Your starting point, featuring a clear title and an icon (like a crown or a simple geometric shape).
- Process: The middle stage, where the details of your workflow are explained.
- Results: The final outcome, emphasizing the “big picture” or data.
Create a separate slide for each of these sections. On these slides, the main circle should be significantly larger—filling most of the screen—to create a “zoomed-in” effect when the transition occurs.
Creating the Zoom Effect
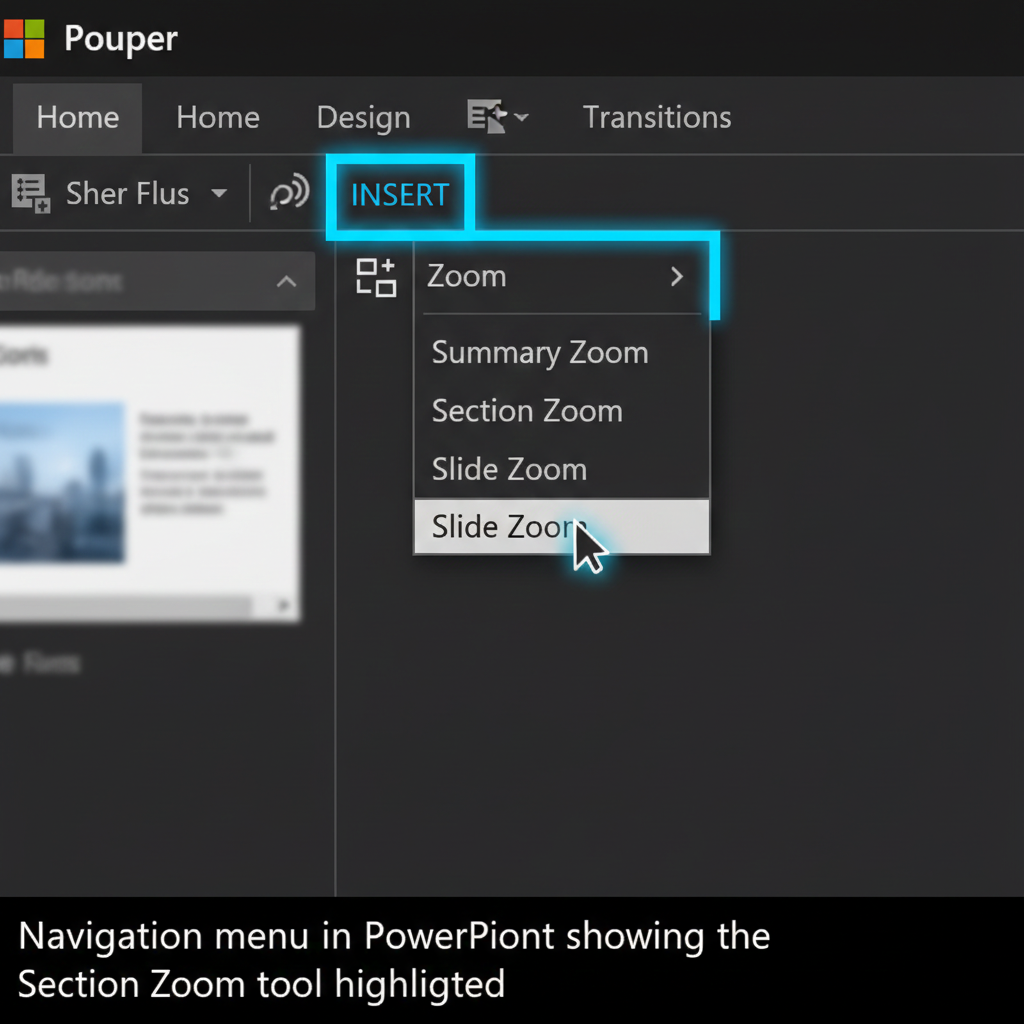
Once your individual sections are designed, return to your main “Overview” slide. Navigate to the Insert tab, select Zoom, and then click Section Zoom. Choose the slides you created for Introduction, Process, and Results.
PowerPoint will generate small previews of these slides. Arrange them within your large central circle. To make them look like integrated icons rather than floating screenshots, use the “Zoom Background” option in the Zoom Tools menu to remove their backgrounds.
Adding the Magic: The Morph Transition
The key to smooth movement between these sections is the Morph transition. Select all the slides in your presentation and apply the Morph transition from the Transitions tab.
This tells PowerPoint to automatically calculate the movement of shapes between slides. When you click on one of your Zoom previews, the presentation will seamlessly “dive” into that section, making the circle grow and the icons shift position in a fluid, cinematic motion.
Final Touches and Timing
To ensure the presentation feels snappy but professional, adjust your transition timings. A duration of around 1.00 to 2.00 seconds is usually the “sweet spot.” It’s fast enough to keep the energy up but slow enough for the audience to follow the visual journey.


Leave a comment