Mastering Page Numbering in Microsoft Word: The Complete Guide
Whether you’re writing a simple report or a complex academic project, correct page numbering is essential. Most professional documents require a mix: no number on the cover page, Roman numerals for the introductory sections (like the Abstract and Table of Contents), and standard Arabic numbers for the main chapters.
In this guide, based on the ATU Library tutorial, we’ll show you how to pull off this “pro” formatting without the headache of manual entries.
Step 1: The Essential “Show/Hide” Tool
Before you start numbering, you need to see the “invisible” formatting in your document.
- Go to the Home tab and click the Show/Hide ¶ button.
- Why? This reveals hidden characters like paragraph breaks and section breaks, which are key to controlling where your numbering changes.
Step 2: Breaking Your Document into Sections
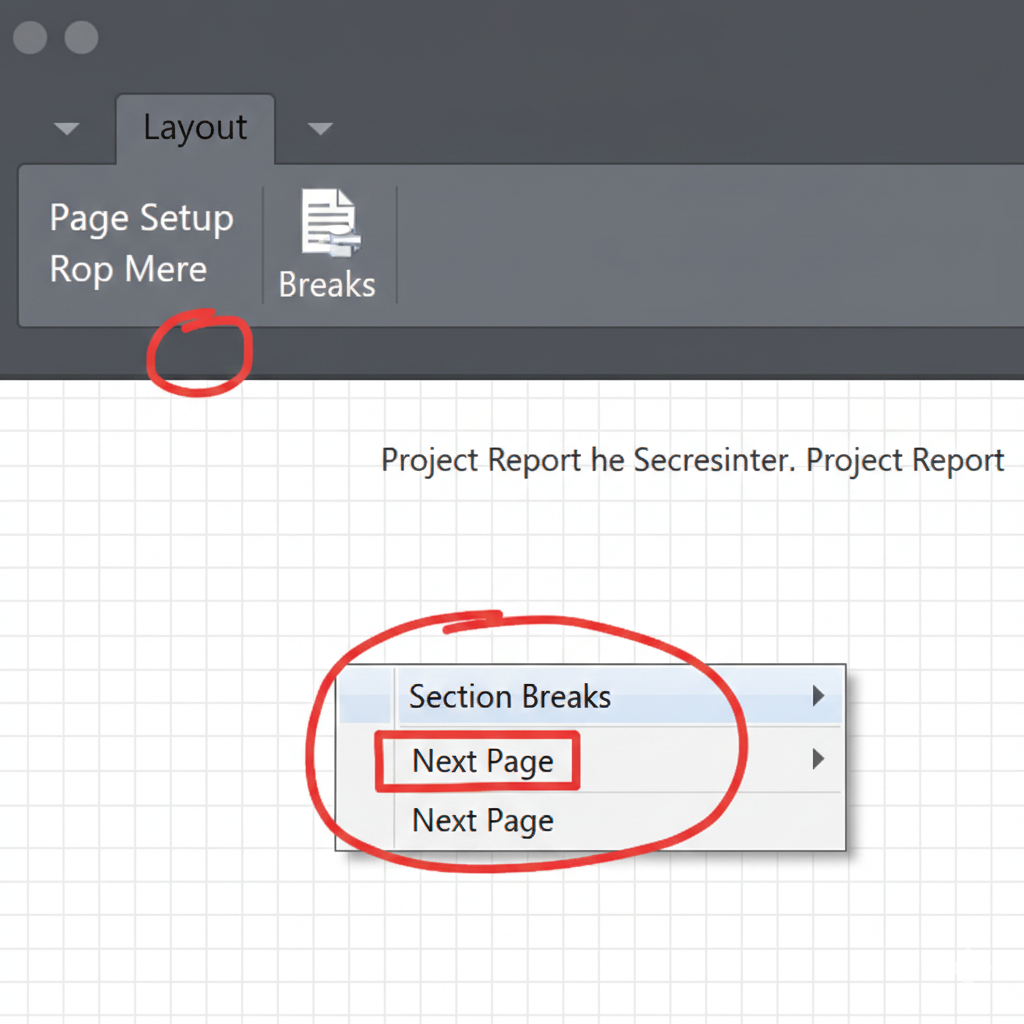
The secret to having different types of numbers (like i, ii, iii and 1, 2, 3) in one file is using Section Breaks.
- What is a Section Break? It splits your document into independent parts that can have their own unique layouts and numbering.
- How to add them: Go to Page Layout (or Layout), click Breaks, and select Next Page .
- Where to place them: Add a break after your cover page and another break at the end of your introductory pages (e.g., after the List of Figures, just before Chapter 1).
Step 3: Breaking the “Link to Previous”
By default, Word links all headers and footers together. To change the numbering in one section without affecting the others, you must break this link.
- Double-click the Footer area to open the Design tab.
- Click Link to Previous to disable it. This “unlinks” the current section from the one before it.
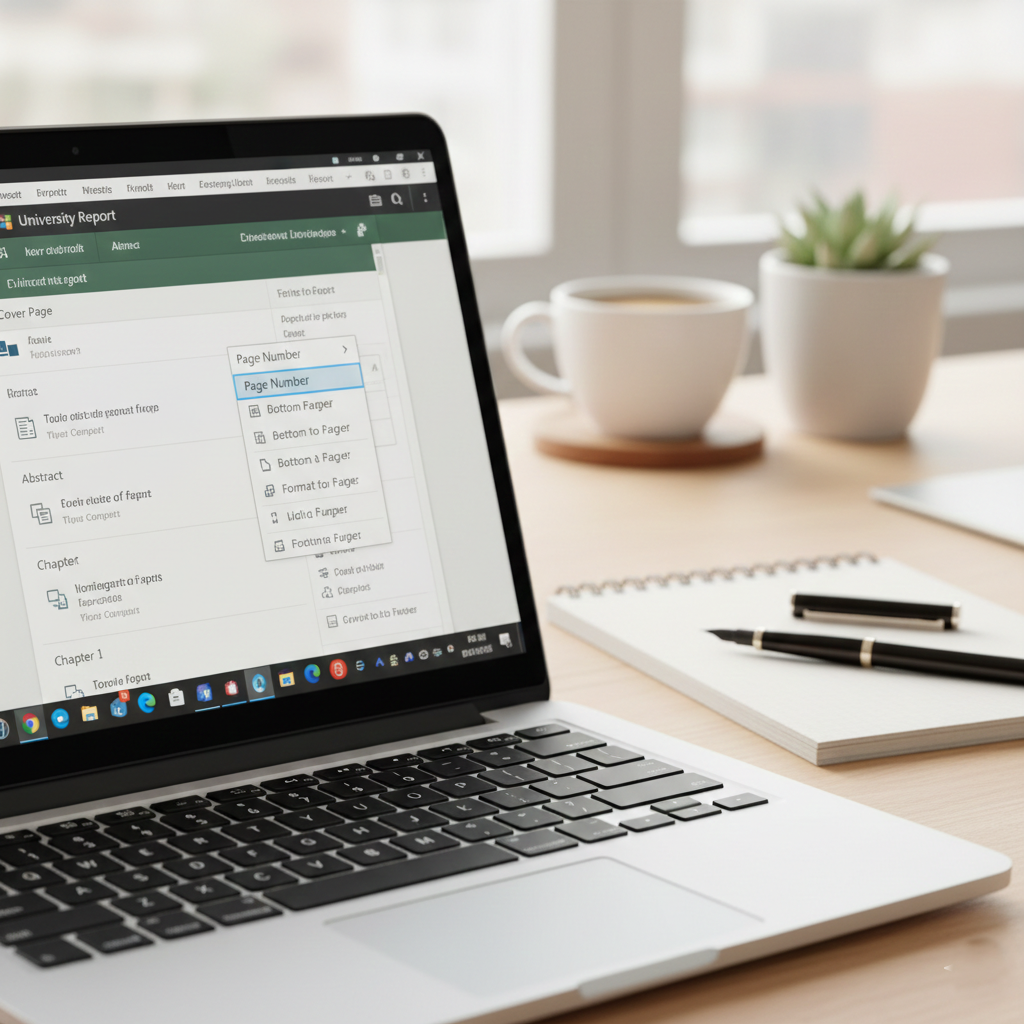
Step 4: Formatting Your Numbers
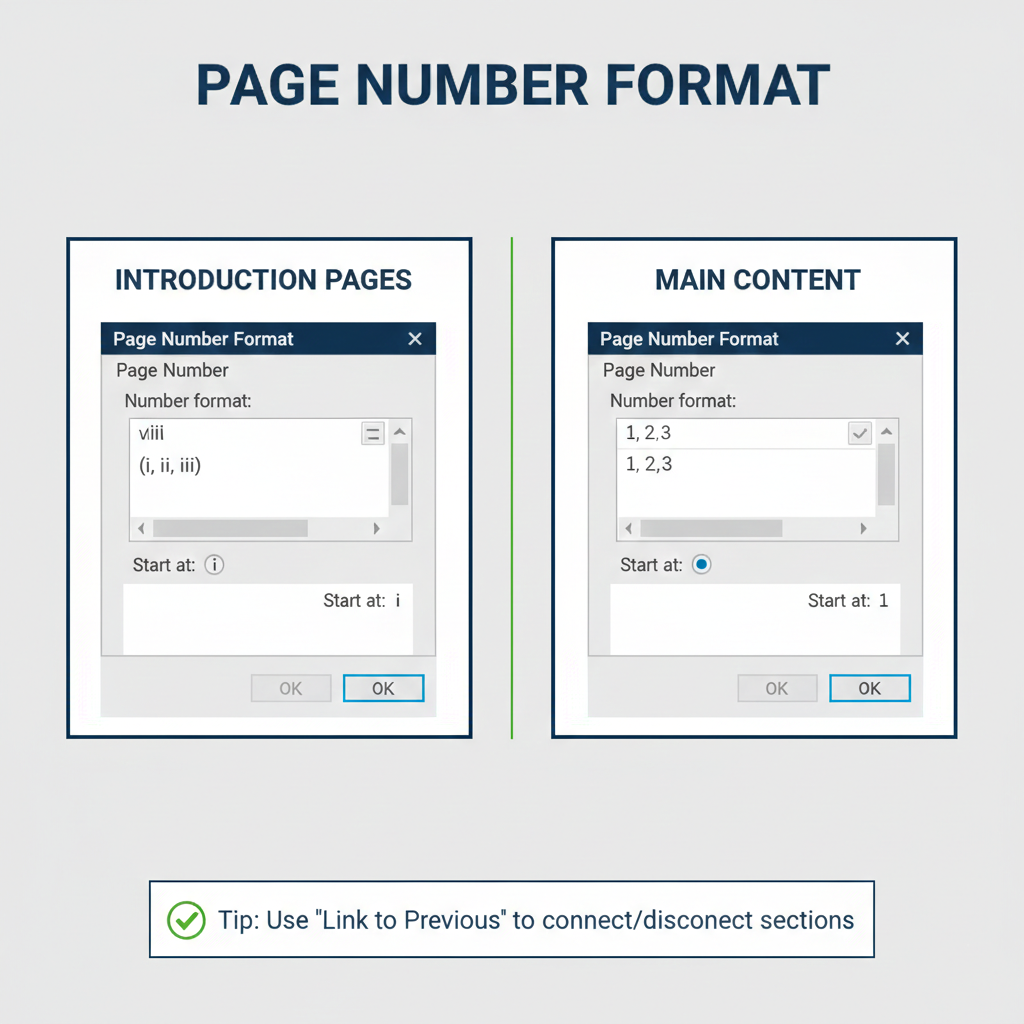
Now that your sections are independent, you can format them:
- For Intro Pages: Go to Page Number > Format Page Numbers, select Roman Numerals (i, ii, iii), and choose Start at: i.
- For Main Chapters: Go to the first page of Chapter 1, select Page Number > Format Page Numbers, choose 1, 2, 3, and select Start at: 1.
Step 5: Removing the Cover Page Number
Your cover page should be professional and number-free.
- Navigate to your first section (the cover page).
- Highlight the number in the footer and select Page Number > Remove Page Numbers.
- Because you disabled the “Link to Previous” in the sections below, your other page numbers will stay perfectly in place! .
Conclusion: Clean and Professional Formatting
Once you’ve finished, disable the Show/Hide ¶ button to see your clean, professionally numbered document. You now have a cover page with no number, intro pages in Roman numerals, and chapters starting fresh at page 1.


Leave a comment